Started out as a necessity by the Inuit people almost 9,000 years ago, Kayaking has evolved into a fun recreational activity. But if you’ve never kayaked before, it’s easy to get lost in the details. Something as basic as choosing the right kayak or learning about the different strokes can make it seem more intimidating than it actually is.
As someone who’s been paddling in the ocean and backwaters for over 15 years, trust me, you can learn all you need to get out on the water in a couple of hours. I did. And that was before the internet.
Let’s get you started!
Kayaking Basics: What Do You Need to Go Kayaking?
Before you can go out on the water, you have to learn about the different types of kayaks, paddles, and the right gear.
Types of Kayaks
There are different varieties of kayaks available depending on which type of kayaking experience you want to go for: Touring kayaks, recreational kayaks, and white water kayaks.
Touring Kayaks
Touring takes place along the shores of the ocean or bays, in peaceful marshes, across lakes, or on flat rivers. If your goal is to explore the nature and wildlife around you, a touring kayak is what you want. These are better-performing and more versatile than the recreational ones. This means they can handle rough conditions and travel long distances in open water. They also have bulkheads with sealed hatches for extra safety, not to mention a lot of storage space.
A touring kayak is usually 12 to 17 feet long, with hulls shaped in a way to increase lift in rough water and waves. These are usually made of lightweight materials like plastic. These come in multiple varieties as well:
- Day touring kayak (the most basic kayak ideal for flat water and little to no river rapids)
- Sit-on-top kayak (perfect for warm weather and water, it has a seat and just enough room for your legs inside the deck covering; there is no open deck)
- Sea kayak (a bit more equipped to handle ocean swells)
- Expedition kayak (best for multi-day trips due to the extra space for clothes, camping gear, and ration. You can customize it with lights and GPS too.)
- Foldboat (this one is designed to fold for easy transportation and compact storage)
- Tandem kayak (it’s built for two people to paddle together)
Recreational Kayaks
As the name suggests, recreational kayaks are designed for the occasional paddler interested in a peaceful paddle on a flatwater stream or lake every now and then. They are usually less than 12 feet in length and made from cheaper materials like polyethylene. They have limited cargo capacity compared to touring kayaks.
White Water Kayaks
White-water kayaking is more like an adventure sport where people paddle through the rapids and other obstacles for the ultimate adrenaline rush. Kayaks built for this kind of heavy-handed fun are made from high-impact plastic and other sturdy materials. They range from 4 to 10 feet long, with a broad hull and blunt ends for easy maneuverability in choppy waters. There are four types of white water kayaks:
- Beginner’s kayak (it offers maximum stability and has some of the features of a touring kayak, making it easier to maneuver than a true white-water boat)
- Squirt boat (think of it as a surfboard with a forward deck for legroom and a seat; meant for highly advanced paddlers only)
- Slalom kayak (it’s specifically made for competitions, for a downhill paddling course)
- Inflatable kayak (it’s best for difficult storage and transportation situations since they are super lightweight)
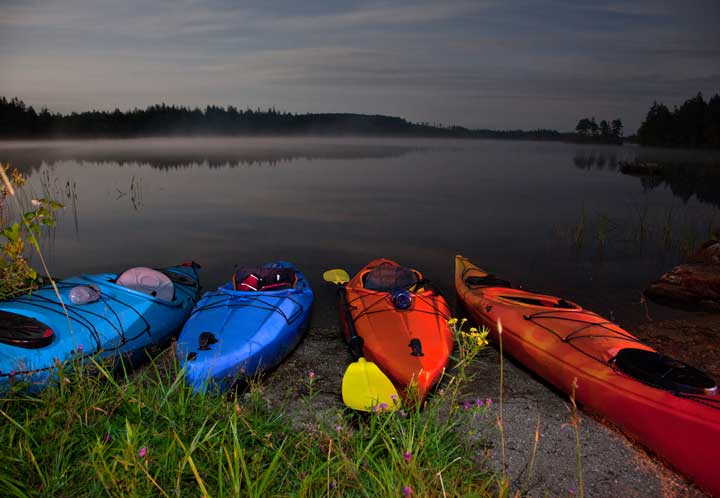
Tip for Beginners: The longer and narrower kayaks are touring/sea kayaks which are only meant for ocean and flat water. The shorter, wider ones are meant for difficult conditions (white water).
Types of Paddles
Paddles come in almost as many shapes and sizes as the kayaks. Before you buy a pair, you need to think about the material, durability, and weight of the paddles as well as the design of the blade. In my experience, the best way to choose a paddle is to first feel it in your hands.
My favorite is a well-made wooden paddle but I won’t recommend it to beginners as it takes a LOT of maintenance over time. Carbon fiber and fiberglass materials are good options if you want something lightweight yet sturdy. For beginners though, I always recommend aluminum and plastic shafts with a synthetic blade.
Choosing the right size paddle is extremely important too. If you are a tall guy or gal – 5’10” to 6’6” – go for a paddle that’s 200cm or 230cm in size. For my shorter friends – under 5’2” – use a paddle that’s 210cm for touring and 188-194cm for white water.
Touring paddles are designed for comfort and efficiency, so they have a smaller and more narrow blade. As a beginner, flat paddle blades are best for you. Whitewater paddles come with wide blades, a rigid shaft, and a feathered shape, i.e., the blades are set at an angle to each other. This way, you can have a lot of control while cutting through the rapids.
Tip for Beginners: Paddles with smaller blades are great for people who want less stress on their wrist joints or those who are short. Large blades are ideal for surf, fitness, and white water.
The Right Kayak Gear & Clothing
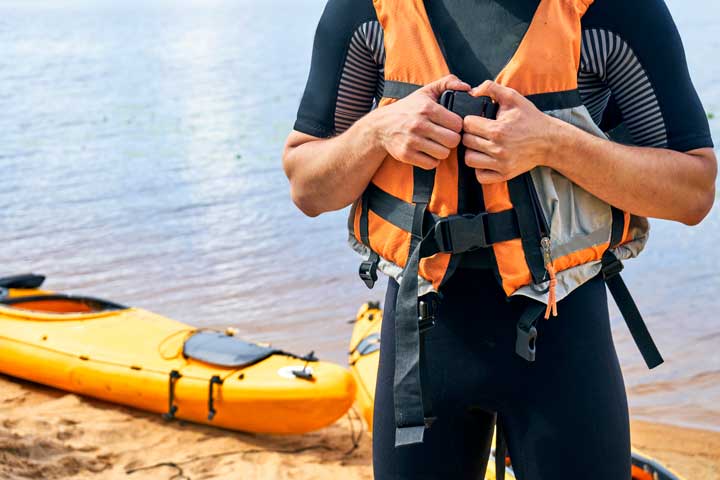
While you don’t need a special wardrobe to go kayaking, there are a few golden rules to keep in mind if you plan to paddle for an extended duration. I call them the “3 Ws” – Weather, Warmth, and Wicking.
Even if the weather forecast tells you it’s going to be sunny skies, you never can tell on the water. A waterproof jacket is a must. You also need to consider the likelihood of precipitation and strong wind; a hooded, lightweight, thigh-length waterproof jacket will prevent water from getting under your clothes.
Many beginners make the mistake of not considering warmth – I don’t care if you’re going on a kayaking trip on the hottest day of your life, don’t overlook this. You may think the air is stifling hot, but water temperature can change abruptly, increasing the risk of hypothermia. Pack a few layers of warmth in an airtight bag, along with an extra set of dry clothes.
Wicking means wearing something that draws moisture away from your body. Synthetic materials are the best for this as they provide warmth, dry quickly, and stay comfortable whether you are rotating your upper body while paddling or just sitting still. If you’re going to be out on the water for several hours, choose a fabric with built-in protection against bugs and UV rays.
For footwear, if you’re a beginner, all you need is a pair of athletic shoes. Some folks prefer sturdy sandals with straps; choose whatever you’re comfortable with. The goal is to protect your feet from rocks on the shore as well as any hidden danger underwater. Neoprene booties and water shoes are also prudent options to keep out the sand.
Also pack a bottle (or two) of drinking water, sunscreen, and a pair of sunglasses. If you’re going white-water paddling, a kayaking helmet is a must. Some other basics include an extra paddle, basic rescue gear, dry storage, and a first aid kit.
Transporting the Kayak & Equipment
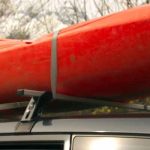
The safest way to transport your kayak from the store to your home and then to the launch site is to buy specialized kayak roof racks. The best position for the boat is to be on its side – never ever drive with the kayak right side up since it’s not aerodynamic in that position. Whenever you haul it on your vehicle, cover the cockpit to hold in the gear (like the safety equipment and paddles) and hinder the rushing air.
Moving the kayak from the parking area to the water is simple enough. Most kayaks are lightweight enough that you can carry one with the cockpit rim on your shoulder. Toggle handles are attached to the stern and bow of most kayaks so two people can easily carry one or two kayaks together. You can also buy a fold-up trolley to haul a heavily-loaded kayak to the launch site. I have created an entire post on how to transport your kayak inside an SUV, without a roof rack, so feel free to check it out.
There’s More To It: Considering Your Environment
Now that you have your kayak, paddles, and gear, it’s time to consider Mother Nature before you take your new purchase (or rental) out for a kayaking trip.
Where to Paddle
Some of you will respond with “on the water obviously” but let me tell you something: there are different types of water in terms of safety. An advanced paddler can pretty much go anywhere they want, but if you’re a beginner, you should stick to the following:
Quiet Water
This is not open to large motorboats and sheltered from the wind. You can quickly get the feel of your kayak in the shallow water and master the basic strokes. Getting in and out of the kayak is also easier, making it perfect to practice rolling and capsizing in a controlled environment.
Lake Inlets and Outlets
These are marshy, relatively shallow areas with usually calm water. If you want to get close to wildlife without causing a disturbance, this is a good place to go kayaking. The only thing I don’t like about marshy situations is the thick mud bottom that makes capsizing really annoying.
Gently-Moving, Shallow Water
I am talking about canals, rivers, and large streams with no rapids or obstacles and currents. You should be able to move upstream with minimal effort.
If you can enlist the help of an instructor or you’re a pro paddler, white waters, open seas, and larger lakes are great places for a more exciting kayaking experience.
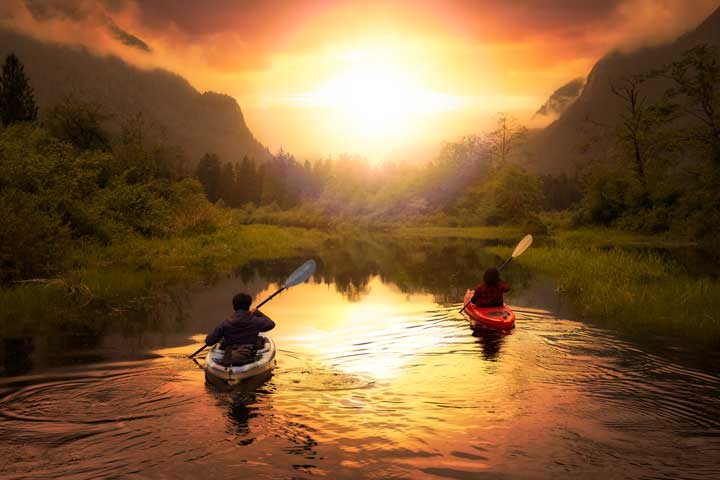
Tip for Beginners: No matter what type of water you’re going on, you should be able to recognize the signs of potential danger. You can do this by looking at how the water swirls, moves and calms down. I highly recommend talking to an instructor or a guide near you for the best advice on how to paddle in the body of water you’re interested in.
Be Aware of the Weather
Weather is a fickle thing, especially over large water bodies. As much as I like to paddle through the rain sometimes, it might not be your cup of joe. If you feel a strong wind blowing up, get to shore quickly otherwise you’ll spend a lot of energy just to stay on your course. Plus, the changing water conditions may become rough enough to cause your kayak to capsize.
Another factor is lightning. It is attracted to an isolated object on the waterway faster than it is to one on the land. If you don’t get to the shore right away, well, it was nice knowing ya!
Remember These Safety Precautions for Kayaking
Paddling off without taking some basic precautions is like driving without a seatbelt – don’t do it. To make sure you return from your kayaking adventure happy and safe, follow these general guidelines:
Be Aware of Your Health & Skill Level
You don’t have to be in incredible physical shape to be able to paddle, but it’s always a good idea to know exactly how physically capable you’re. Most people think that the shoulders or arms are the most important muscles for paddling. They are not. As gym trainers say (yours truly included), it’s all about the core. Your lower back and abdominal muscles should be in decent shape if you want to go kayaking. If you’re not at all used to physical exertion, start doing some basic stretching exercises and workouts a few weeks before.
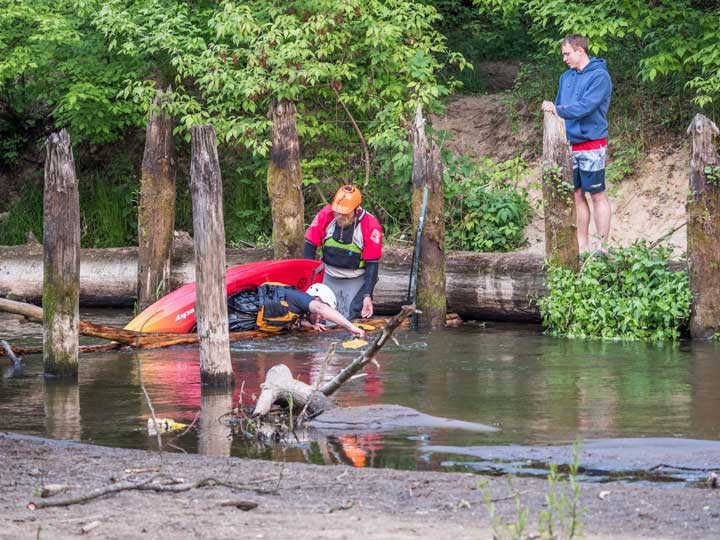
How to Avoid Capsizing and What to Do When It Happens
There are many reasons why a kayak can capsize and it’s almost impossible to foresee all of them. However, you can take a few precautions to try and prevent that from happening. The first thing to remember is to keep your weight centered and avoid leaning over too far. After all, this tiny boat is not a very enduring construction by nature. If you drop something in the water, maneuver the kayak towards it and reach with your paddle to keep most of your weight centered.
When you’re getting in or out of the kayak, maintain three points of contact for maximum stability. For example, as you step in the kayak with one foot, keep both of your hands on it. You do need to carry gear even on just a day trip but never overload your boat. Stow your gear as close to midway in the boat as possible, both fronts to back and side to side. Secure everything to prevent it from tumbling around all over the place.
Always wear a Personal Floating Device (PFD) when in a kayak. A sudden dip in cold water can jolt you out of your senses, so I cannot stress this enough – practice how to capsize and recover.
When you do capsize, here’s how to handle it:
- If you capsize near shore in calm water, it’s more annoying than dangerous. Just signal others that you’ve gone in the water and that you’re okay. Gather any gear that’s starting to float away, especially your kayak paddle. If you can, right the kayak and tow it to shore with the end line either by swimming or walking with a modified sidestroke.
- If you capsize in moving water, try to make sure your body is on the up-river side of the boat so you don’t become crushed or trapped against an obstruction. If the kayak is pulling away, the safest position for you is on your back with your feet pointing downstream. This will keep your head safe from banging into something or going underwater. If the water is not too rapid, you can backstroke to shore at a slow pace to keep your head upstream.
- In moving water, don’t stand up unless the water is less than knee-deep. If you have been knocked over, your foot could become wedged under a rock or your head may end up downstream.
- In calm water, don’t let your equipment float away.
- Don’t try to re-enter the kayak if it has been damaged. You could fall right back in.
- Many newbies get panicked at the idea of capsizing – don’t do that. I know that’s easier said than done but if you panic, you won’t be able to do what’s necessary.
- As soon as your kayak goes upside down, bang on the sides a few times as hard as you can to attract attention and wave your arms to signal for help. After a few seconds, try exiting the kayak.
- To get out of a capsized kayak, maintain a forward curl position with your chin tucked towards your chest. Then, do a forward roll motion holding on to the kayak with one hand, and draw your legs out of the cockpit.
Getting to the Fun Part: How to Actually Kayak
Alright, let’s get you inside the kayak!
How Do You Get Into a Kayak: Step by Step
The easiest way to enter is by placing the bow in the water and keeping the stern on land. Then, sit on the back deck, aim your feet into the cockpit, and slowly slide your legs into the kayak until you’re seated. Shift a little, side to side, and push with the paddle, and voila! You’re afloat.
This process will be a little different if the bank is elevated, the beach is too rocky, or you don’t want to risk damaging an expensive kayak. Place the boat in the water parallel to the water’s edge, with one end of the paddle resting on the shore. The other end should be extended across the boat behind the cockpit. With most of your weight against the cockpit’s back rim and paddle shaft, slowly shift from a sitting/crouching position on land into the kayak. Then, extend your legs and get into the correct paddling position.
No matter what the situation is regarding your entry into the kayak, keep these basic rules in mind:
- Always move smoothly and cautiously; don’t be in a hurry.
- Maintain 3 points of contact – two hands and one foot, or two feet and one hand.
- Keep a low center of gravity, i.e., keep your body in a low, crouched position as much as possible.
- Hold on to the paddle
- Center yourself in the kayak.
Practice these techniques in the calmest conditions possible and with the guidance of at least one other person. Landing and getting out of the kayak involve these same rules.
Maintaining the Balance
The key to maintaining your balance in a kayak is to stay loose, keep your upper body-centered, and not overextend. If you tense up, you’ll be working against the kayak instead of working as a part of it. I hate to sound like a broken record, but practice is the keyword here. Experiment with different body movements in the kayak in calm water so you can develop a feel for the kayak and the water.
How to Grip the Paddle
The correct grip will make your whole kayaking process more efficient. To grip the paddle correctly, grab the shaft with both hands over your head and your elbows at a 90-degree angle to the paddle blades. Your dominant hand (right or left) should have a straight wrist and concave (power) side of the blade should be facing the water. Then bring your arms and the paddle straight down in front of you without loosening the dominant hand. The blade on this side should now be vertical with the power side of the blade facing forward. Never use your dominant hand to rotate the paddle – this should be done by the opposite hand only.
The Basic Kayaking Strokes
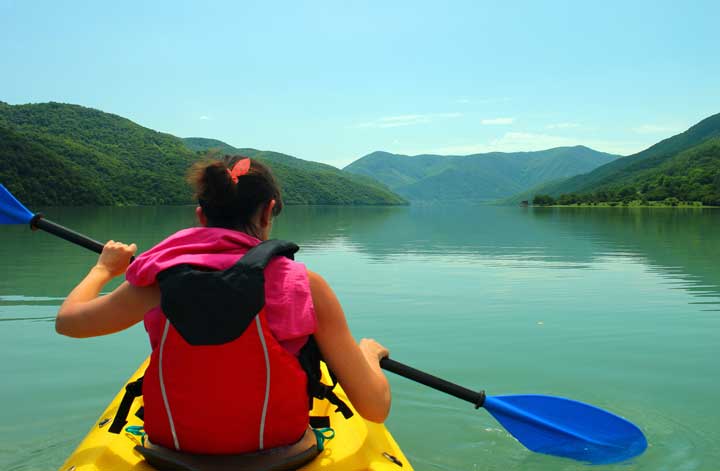
Kayak strokes are straightforward. When you plant the paddle in the water and pull, you’re pulling yourself and the kayak along. The power in the strokes comes from the push of your upper hand, twist of your torso, and pull of your lower hand. By using all three, you’ll be able to make strong, smooth strokes.
Generally speaking, there are six types of strokes:
The backward stroke
Think of it like walking backward. As the name suggests, it will move your kayak backward. You’ll rotate your left shoulder with torso as much as possible and place the paddle as far back as you can. Then your lower hand will push forward while the upper hand pulls back. Your right arm will move to your shoulder, then you’ll repeat this motion from the right side.
The forward stroke
To do this, the blade should be totally immersed in the water and parallel to the centerline. The stroke should not cross the centerline as it will make the stroke too long. This can cause the kayak to turn.
The backward/reverse sweep stroke
This is basically the opposite of the forward sweep stroke that slows the kayak. It will turn your kayak to the side you perform the stroke on.
Without changing your grip on the paddle (like you’ll do for a backward stroke), place the blade into the water as far back as you can. Do this by rotating your shoulders and torso for the best extension. With rotation from your torso, draw the blade forward in a wide arc, to remove it from the water before hitting the kayak’s bow.
The forward sweep stroke
This is the most commonly used stroke to turn the kayak. You reach forward as far as possible to make a specific turn and stick the blade into the water. Instead of drawing the paddle along the side of the kayak, you’ll reach out with a straight lower arm and pull the paddle back in an arc.
The draw stroke
These strokes pull the kayak sideways. Turn your body toward the direction in which you want to move. Then extend the paddle out as far from the edge of the kayak as possible. Make sure the blade is turned toward the boat before putting it in the water. Then pull the boat to the blade using both your arms and keep the paddle almost vertical.
The stop
You can’t stop a kayak by just ceasing to paddle. You’ve to stick the blade into the water right at your side. The blade should in perpendicular to the kayak. Try to hold the paddle straight until you feel the resistance is starting to turn the kayak. Then quickly put the paddle into the water on the other side and repeat these steps until you’ve stopped.
Frequently Asked Questions About Kayaking
Is it difficult to kayak?
No, I won’t say it’s challenging to learn to kayak. You just need a few basic kayaking skills to paddle as I have covered in this post. You also need a good instructor or guide to help you learn how to enter and exit the kayak, and how to perform the different types of strokes. All said and done, you can learn the whole process within a day.
What is the technique for kayaking?
The basic technique for kayaking you need to keep in mind is to activate your core (abdominal muscles). Then push the paddle back away from your upper arms and the shoulder, while pulling back towards the body using your arms, core, and chest. For every stroke, you need a good grip – keep your knuckles in and hands in a centered position, shoulder-width apart.
Do kayaks flip over easily?
No, kayaks usually don’t flip over but it depends on what type of water you’re paddling in and what sort of kayak you have. For example, if you’re in an ultra-light kayak in white water, your odds of flipping over are really high. On the other hand, if you’re out on a calm lake or river in a recreational kayak, it will be extremely hard to tip over.
What do you do if your kayak flips over?
The first thing to do when your kayak flips over is to stay calm. Panicking will only make the situation worse. And keep in mind, if your kayak floats, you may still be able to reenter it. Wearing a personal flotation device (PFD) is important when kayaking, as it can literally save your life if you capsize. It will help you float with the boat instead of wasting energy trying to trudge through the water.
Depending on the depth of the water, you may not be able to flip the kayak back into the correct position. After a kayak capsizes, it’s likely to be full of air, so trying to right it in deep water could allow it to fill up. This will make it even harder to push back to shore.
In case your kayak has flipped over, swim it back to shallower water or the shore. This will let you flip it back over and drain any water out. It will also allow you to re-enter easily. If you’re too far away from the shore, you’ll probably need to flip it in deep water. You can do this by getting under the kayak to grab the rims of the cockpit and pushing it over. Some people choose to float on one side of the kayak to push one side up and over to turn it.
Is it weird to go kayaking alone?
Not at all! Going out on a kayak by yourself is NOT weird. In fact, most experienced paddlers I know – including yours truly – prefer solo kayaking.
How do you paddle a kayak fast?
You can learn to paddle your kayak faster with practice. The difference between a slow paddler and a faster one doesn’t lie in the technique but in the speed with which they perform the strokes. That being said, the forward stroke is the best way to increase your speed.
How do I keep my kayak straight?
To keep your kayak straight, you have to consider its overall length and width (both above and below water) as well as the shape of the hull. If you’re in the wrong kayak, you’ll have a hard time keeping it on course. For example, if you’re using a whitewater kayak on a lake, even the slightest wind will turn you.
If you’re talking about your kayak-balancing skills, it’s all about remaining loose. Keep your upper body centralized in the kayak and don’t lean too much in any one direction. If your body is all stiff and rigid, it will work against the kayak. Try to keep your chin and spine in line with the center of your boat.
Are sit-on or sit-in kayaks better?
Choosing between a sit-on or sit-in kayak is totally a matter of personal preference. I know many people think that a sit-in kayak is safer because it keeps their lower body sheltered from water and cold winds.
I personally don’t like sit-inside kayaks because I am a tall dude and they make me feel confined. I like to have a little room to move around while paddling. Plus, if a sit-in kayak capsizes (flips over), the water will flood into the cockpit, making it harder to right.
Is a kayak easier to flip than a canoe?
Usually, kayaks are easier to flip than canoes, but I guess it depends on what type of kayak are we talking about. A white water kayak is much easier to flip over than a recreational one.
Is a kayak better than a canoe?
Oh, this is a loaded question. I won’t say that kayaks are better than canoes because they both have different features. A canoe is much more stable and harder to flip over. However, a kayak is way faster and easier to maneuver than a canoe, due to its lighter weight and shape. Again, this is a matter of personal preference.
The Bottom Line
I wasn’t kidding about this guide being everything you’ll ever need to learn about kayaking. Take some time to process this info and remember – it’s all about practice. Once you’re out on the water, it will all come together.


